
Unlike humans birds are not mammals, meaning they have requirements that may appear unnatural or alien to humans. This makes rearing baby birds an incredibly difficult and daunting task for human owners. However, with enough understanding of birds themselves and research on the art of bird-rearing, hand rearing a bird can not only be a success, but can also be incredibly rewarding.

Pulling a Chick from the Nest
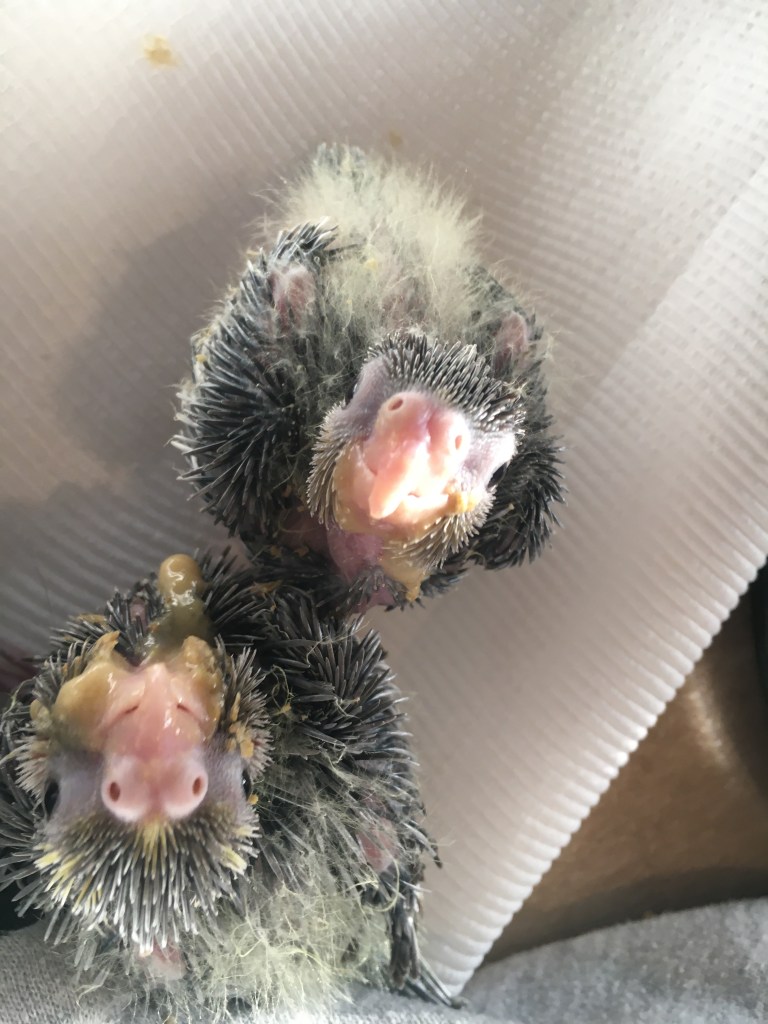
The most common age for a cockatiel chick to be pulled from the nest for hand rearing is 2-3 weeks of age. At this age, a chick is still young and impressionable, but not quite so demanding as they are in their first few days. A chick at this age will be developing pin-feathers, will behave defensively when prodded or disturbed while in the nest (such as rocking back and forward or hissing) and will generally weigh between 45 and 72 grams. To get a better understanding of the best ages to begin hand rearing, please see the article: ‘Hand-Rearing: The Pros, the Cons and When to Start’.

Before pulling the chick, ensure you have your brooder set up and that the brooder temperature is appropriate, as you will need to place the chick in the brooder immediately after it is removed from its nest. This will prevent any illness that can result from drastic changes in body temperature or chilling.
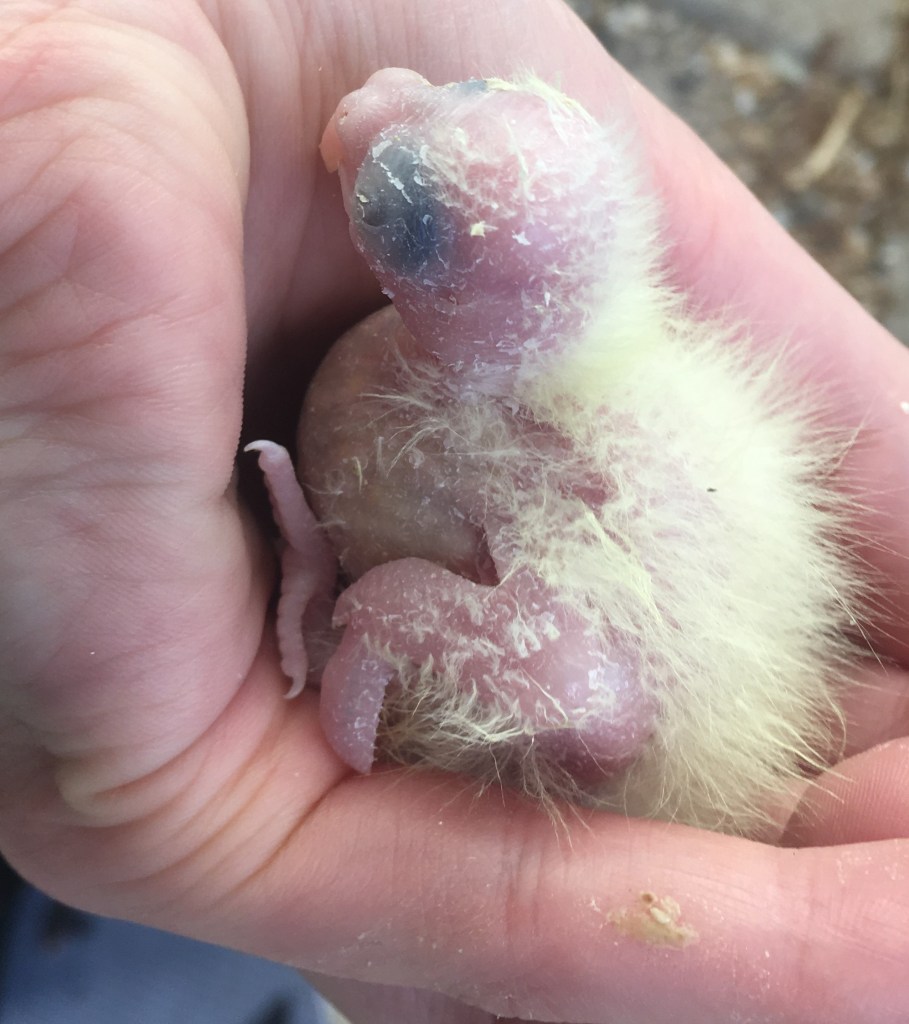
When you pull a chick from its nest, keep a close eye on its crop (the region below a chick’s neck where food is stored). A chick that has a full crop will be prone to accidental asphyxiation when handled and crop-stasis if the temperature in its brooder is colder than within its nest, so you should aim to pull a chick only when its due for its next feed or its crop is 3/4 to fully empty.
When taking a chick you will also need to take the welfare of the parent cockatiels in mind. Remove the nesting box as soon as possible to lower stress levels and prevent the parents from having any further chicks, even if you anticipate another clutch. When young chicks are removed, it eliminates the usual ‘non-laying’ and relatively less stressful period of raising older chicks. By removing the nesting box, it ensures the parents still receive this downtime by removing opportunities to immediately lay and begin the debilitating chick-raising process again. This will also reduce the risks of egg binding and calcium deficiency disorders in the cockatiel mother.
Many hand-rearers will leave one or two chicks in the nest with their parents so the parents. This is because some cockatiel parents will give up on laying due to the stress and hopelessness of constantly losing their chicks to hand-rearers. Allowing them to rear at least one chick each clutch can not only give the parents the experience of raising chicks, but can also be relatively safe for the chick as it will not have the stress of competing with siblings for food or affection.
Handling Your Chick
Before you handle a chick, always make sure your nails are trimmed. A cockatiel chick’s skin is incredibly fragile and prone to laceration from sharp implements such as nails, and these open cuts can quickly result in infection or serious blood loss. Washing your hands before handling a chick will also prevent any harmful chemicals you have touched – deliberately or without knowledge – from coming into contact with your chick’s skin or respiratory system.
When picking up a chick, support the chick’s abdomen by scooping it into the palm of your hand. If a chick cannot be scooped, pick it up gently at the base of the body below the wings and immediately place it within the palm of your hand. Never place pressure on the crop of a chick, as this can cause food in the crop to be pushed up into the mouth, possibly blocking airways and choking a chick. Also avoid placing any excess pressure on the developing wings or legs of a chick, as they are very fragile and can easily be fractured.

Source: https://www.futurepets.com/trivia/baby-bird-full-crop.jpg
Brooders and Nests
Before you pull a chick from its nest you will need to ensure you have the correct husbandry requirements in place. This may include purchasing a reliable brooder that self-regulates temperature and provides a safe living environment, or could mean creating your own make-shift brooder using safe resources. For more information on putting together safe brooders for cockatiel chicks and where to purchase resources, see the article: Assembling Your Cockatiel-Rearing Toolkit.

Substrate
The substrate within your brooder should be easy to clean or replace, and easy to purchase. Newspaper, paper toweling or tissues are usually the best choices for substrate as they are inexpensive and easy to find in supermarkets. They are also easy to replace in a brooder, and make it easy to check on the quantity and consistency of droppings to ensure the chick is healthy.
Temperature
The temperature of a brooder should always be monitored using a thermometre or thermostat. A thermometre can be purchased at any pet store – usually within the fish or reptile aisles – and will include a digital temperature gauge and a sensor that is placed within the brooder. Ensure this sensor is placed somewhere the chick cannot access, as hungry chicks may mistaken it as food.

Click for link to purchase
The temperature a brooder should be will primarily depend on the age and size of the chick, as well as it’s development. For example, most chicks when removed from their nests (at around 2 weeks) are kept at around 35 degrees Celcius. However, some chicks may have less body weight and feathers and prefer a higher temperature and some may be quite heavy and have well developed feathers, requiring a lower temperature.
To get an idea of the perfect temperature for your chick, check up on the chick often and note its body language. If a chick is sitting close to the heat source and shivering, it’s a good sign the temperature needs to be increased. However, if a chick is breathing heavily or panting, holding its wings out at its sides, and sitting in the coolest region of the brooder, you may need to decrease the heat in the brooder. A chick with significantly red skin is also a sign of dehydration common in both overheated and chilled chicks, and is a sign that temperature should be evaluated and body language observed.
Always ensure you check the temperature manually by placing your hands in the brooder to check if it’s warm each feed, as issues with faulty thermometres can be common and a few hours of chilling with a young chick can cause a lifetime of damage.
Safety and Convenience
When setting up your brooder, place it in an area that is accessible for constant monitoring but is still safe from any potential threats such as falls and predators. The brooder should be easily opened so the chick can be removed for feedings, but should not be so easy to open that the chick could free itself or other predators such as cats or dogs could gain access.
The brooder should also be easy to clean when necessary, and should be large enough for a fledging chick to stretch its wings without hitting the sides and harming itself.
Light

Click for link to purchase
One of the most important aspects of a brooder is ensuring it is constantly dark, much as a cockatiel’s nest would normally be. This means placing a towel or blanket over the brooder – which will also help keep heat in – and using infra-red heat lights rather than the bright heat-lamps often used when raising young chickens. This will help the chick to get the sleep it needs to develop, keeping it healthy and happy.
Cleaning and Sterilisation
Cockatiel chicks, much like human babies, are born with very little to no immune system, making them incredibly susceptible to disease. Chicks that have been removed from the nest for hand-rearing will be even more susceptible, as it is proven that a parent cockatiel’s regurgitation contains a form of antibody similar to that of a breast-feeding mammal – an antibody that formula cannot provide.
Due to the low immunity of chicks, it is up to their human carers to provide protection against viruses, bacterium and yeast by lowering the likelihood the chick will come into contact with them. To do this, cleaning and sterilisation must be a priority.
Click for link to purchase
Most problems with parent-reared chicks occur due to poor nest hygiene, as parasites, yeast and bacteria are often breed in old droppings and deceased chicks. This is a rare occurrence with hand-reared chicks, as most rearers regularly clean brooders to prevent the build-up of droppings. Instead, it’s poor sanitation of feeding tools that often leads to illness in hand-reared chicks. This is due to the build up of bacteria and yeast in uncleaned or unsanitised regions of tools, such as syringes, which chick ingest when fed. It is important to remember that most bacterium and yeasts are so small that they are invisible to the human eye, making it impossible for rearers to know when there is a colony growing in their feeding tools.
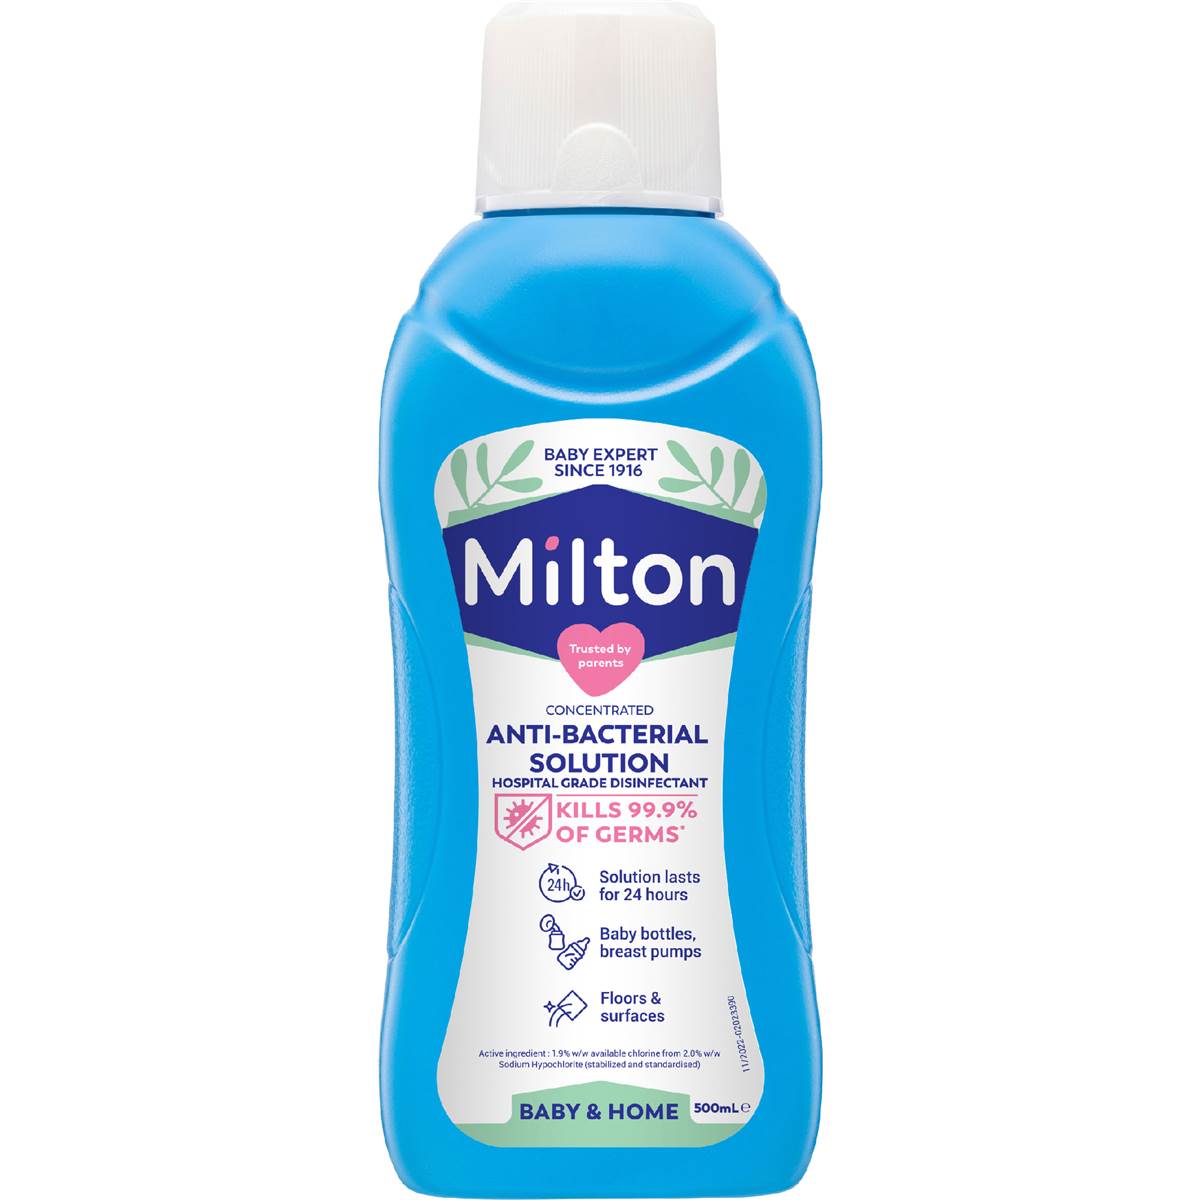
To prevent bacteria or yeast from growing on tools, try to purchase disposable tools and replace them often and ensure all tools are both well cleaned and sterilised before and after feeds. Sterilisers found in the baby sections of supermarkets are the safest to use as they are designed for poor immune systems. Ensure you follow the instructions on the sterilising liquid well. Once the items have been sterilised, place them into a large bowl and rinse them using boiling water, then dry the items off (cooling syringes by sucking up and expelling cooled water) so as not to burn the chick. Some sterilising fluids encourage users not to rinse the fluid off, but this advice is primarily directed towards raising human babies and, due to the smaller size of a cockatiel chick and their differing internal systems, it is best you rinse to avoid possible poisoning.
All tools that come into contact with your chick or its formula should be sterilised before use, including mixing forks and mixing bowls or containers.
Feeding Utensils
Syringes, spoons and crop-needles (or crop-tubes) are all items used to feed cockatiel chicks. However, only syringes and spoons will be examined in this article as crop-needles are primarily used by advanced hand-rearers, are the least ‘natural’ feeding technique, and can cause a range of behavioural problems and illnesses when used incorrectly.
Note: Please read through all information before attempting to feed a cockatiel chick.
Syringe-Feeding
Click for link to purchase
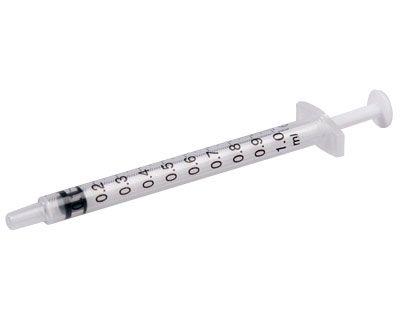
Syringes are usually used for smaller chicks less than 50 grams. Smaller chicks are generally less capable of controlling their consumption and far more likely to overfeed when their intake is not being monitored. Smaller chicks will also have smaller beaks, which leads to bigger messes when spoons are being used, as food is more likely to be spilled. Using a syringe not only reduces mess – as it is smaller in size and can fit inside a small chick’s beak easier – but it also allows for better control over how much a chick eats, as the chick can only consume what you expel from the syringe, and the barrel of the syringe itself contains measurements to monitor how much is being consumed.
Syringes are easily bulk-purchased from online stores at very affordable prices. They are disposable, which prevents the growth of bacteria, and they will usually come pre-sterilised, preventing excessive cleaning. In general, a young chick will do well with a syringe that can hold up to 1-2 ml of fluid, as the plunger will be easier to control in a smaller syringe.
Syringes, however, do have their downfalls. For one, the more active a chick gets in the eating process, the more likely it is to place the entire syringe in its beak, potentially causing damage to the muscle or tissue at the back of the chick’s throat. Chicks are also provided with less opportunity to feel the heat of their food before consuming it and crop burns can be an issue. Chicks are also given less opportunity to taste the food they consume, as the syringe will often bypass the taste-buds. For the latter reason, it is recommended that once your chick is about 60-70 grams you switch to spoon-feeding. This will allow for a better transition into eating solid foods (weaning) as the chick will be drawn to experiencing the flavours of different foods.
How to Syringe-Feed
- Using a sterilised syringe, suck up the temperature-checked formula into the barrel using the plunger.
- Quickly wipe down the sides of the syringe to prevent mess.
- Place the tip of the syringe into the corner of the chick’s beak.
- When the chick opens its beak, place the tip of the syringe through the corner of the beak on a diagonal angle, aiming for the back of the beak. This will ensure the syringe is farther enough back in the beak to prevent food from travelling down the windpipe (glottis), but not far enough to cause damage to the throat.
- When the chick begins bobbing it’s head (pumping) in a hungry motion, expel formula from the syringe and into the chick’s mouth. If the chick does not bob its head, you may need to expel some of the formula before placing the syringe into the chick’s mouth to let it know there’s food. If the chick still does not eat, either the temperature of the formula isn’t correct, or the chick simply isn’t hungry and you may need to try again later.
- Feed in one bout of a few seconds, then take the syringe away and allow the chick to breathe. Do this regularly to prevent the chick from aspirating (choking). Ensure you take the syringe away completely during breathing breaks, as the chick may continue to swallow while the syringe is in its beak, resulting in large air bubbles in the crop.
- Feed at a regular pace, not too fast or too slow. If you expel formula from the syringe too fast, formula will overflow from the chick’s beak and possibly choke the chick and if formula is expelled too slowly, air bubbles will form in the crop (these can be massaged out, but cause serious problems in the crop if they occur often).
- Throw out or clean the syringe (removing the barrel to get a better clean), and sterilise before the next feed along with all other feeding tools.
Spoon-Feeding

Spoon-feeding allows for chicks to taste their food before it’s consumed, making the chick more likely to begin testing out new and varied solid foods earlier on, as they will enjoy the variety of flavours rather than becoming overwhelmed by them as crop-needle fed chicks may. It also allows chicks to control their own consumption, which is useful as it prepares them for weaning, when they will have full control over when and how much they eat. Chicks can choose to step away from the spoon to breathe, creating less of an opportunity for aspiration, and chicks can also control the speed at which they eat.
Although metal spoons specifically created for hand-feeding are available, plastic spoons are generally better, as metal spoons can hold heat easier and result in burns and will require vigorous cleaning or an expensive replacement routine. Plastic spoons are also easy to access – as they can be purchased in bulk from local supermarkets – and are relatively inexpensive.
To make a plastic spoon into a hand-feeding spoon, place the spoon into boiling water until it is mold-able, then bend the end of the spoon into a small ‘u’ shape, providing a point where a chick’s beak can sit. When the spoon has hardened and cooled, it will be safe for feeding.
Much like syringes, spoon-feeding also has its down-sides. Spoons are much larger and are more likely to cause mess. Spoons can also be difficult to maneuver, lessening control over chick consumption and creating an opportunity for overfeeding, hence why spoons are not recommended for very young chicks or chicks with poor control over feeding habits. Spoons also do not come pre-sterilised, meaning that they must be manually sterilised along with other feeding tools before each meal.
How to Spoon-Feed
- Dip the sterilised spoon into the formula, collecting enough formula to fill about 1/4 to 1/2 of the spoon.
- Wipe the bottom of the spoon on the formula jar/container, or using a paper towel, to prevent mess.
- Place the spoon at the tip of the chick’s beak. When the chick feels the warmth of the food at the end of the spoon, it should open its beak.
- Allow the chick to feed itself using the spoon. The chick will usually place its beak over the tip of the spoon and begin head-bobbing/pumping to gather food into its mouth.
- Keep the spoon relatively steady to prevent formula from over-filling the mouth and tip up when the spoon is emptying to allow the chick to get the last bits.
- Once there is little food left moving in the centre of the spoon, scoop up some more formula and present to the chick again.
- Repeat this process until the chick no longer appears interested in the formula (when head bobbing significantly slows) or when the chick has eaten enough food for its weight.
Mixing Formula

Click for link to purchase
For more information on the best tools and types of foods for cockatiel chicks, see the article ‘Assembling Your Cockatiel-Rearing Toolkit’.
Before you start feeding your cockatiel chick, you will need to have the correct food. Cockatiel chicks should never be fed anything other than veterinary approved formula (either by recipe, or by commercial brand pre-packaged formulas). Many people attempt to feed cockatiel chicks watered-down mashed foods such as breads, but these foods have very little nutrients to fast growing birds and lead to chronic and often fatal diseases such as metabolic bone disease, which causes ‘rubbery’ bones and malformed beaks (especially common with young magpies who have parents who are fed often by humans and commonly leads to euthanasia).
When making formula, always stick to the instructions listed on your formula’s packaging or on their website. All formulas have slightly varying ingredients and therefore all formulas will have slightly different instructions to ensure the temperature and consistency of the formula is safe for chick consumption.

Click for link to purchase
You will also need to ensure you are constantly monitoring the temperature of the formula before feeding. Spoon-fed chicks may shake their heads and refuse foods if they feel they are too hot or too cold, but syringe-fed and crop-needle-fed chicks will likely not gauge the temperature of their food as it bypasses their taste-buds, making them extremely susceptible to serious crop burns and lesions, along with slow-crop and yeast/bacterial infections from cold food. Even if your chick does shake its head and reject cold or hot food, it can still result in burning to taste buds or other areas of the beak and chicks may still accept food that is slightly above or below the needed temperature. For these reasons, it is vital you use a thermometre to measure formula temperature. Any thermometre will usually work as long as the possible inaccuracies of temperature are accepted (it is always safe to test the formula on your wrist even after you use a thermometre to ensure the formula isn’t too hot and the thermometre isn’t damaged) and a probe-cover or Glad-Wrap cover is used to prevent liquid damage to the thermometre, which will result in false readings.
When to Feed
Before feeding your chick, ensure its crop is either 3/4 or completely empty. If you are unsure of what a full or empty crop looks like, take photos of your chick before and after each feed. A completely empty crop should not be visible and should be flat against the chick’s chest, whereas a slightly filled crop should appear as a small lump at the base of a chick’s neck, directly in front of the abdomen. A chick with a full crop should not be fed, as overfeeding results in the overstretching of the crop, the damaging of crop muscles, and the eventual inability to digest food. A chick with a constantly filled crop should seek avian veterinary assistance immediately, as it can be a sign of serious illness.
Weight Gain and Logging
Cocktiel chicks must only consume around 10% or slightly less of it’s body weight at each feed. For this reason, it is vital you use a set of gram scales at each feed to ensure you are neither over-feeding nor under-feeding your chick. Gram scales can be found relatively affordably at supermarkets.
When taking your chick out to feed, weigh it both before and after feeding to ensure only that 10% has been consumed. For example, if a chick weighs 70 grams at first, only feed the chick until it reaches a weight of 76-77 grams. If a chick is significantly small (below 10 grams), you will need to rely on both observation and your scales to work out when your chick’s crop is full. The ‘Useful Resources’ section of this article will contain links to images of chicks with full and empty crops as examples.
If you find it diffcult to keep your chick still on the scales, try placing a small box or container on the scales prior to turning them on so that the weight of the box does not effect the number on the scales, then place the chick securely in this box for weighing.
When rearing cockatiel chicks, it is usually a good idea to keep a logbook of all feeds to monitor weight gain. The following link contains a blank PDF example of a logbook that can be used for monitoring feeds, weight gain and overall development. It also contains a list of average weights for ages and how often a chick of this age and weight will usually be fed.
Remember that this is just a guideline, as some chicks may be underdeveloped and require more feeds that normal for its age. The best way to put together a feeding routine is to simply feed the chick whenever it has an empty or 3/4 empty crop and to record the feeds to work out how many times a day your chick requires food. These times will change often, as the chick will grow, eat more and stay fuller for longer, and begin rejecting feeds as it nears weaning and fledging. In general, if you are unsure and your chick’s crop is emptying quickly, feeding guides will usually be safe to follow (follow the weight recommendations, even if the age the weight corresponds with does not match your chick’s age) as long as weight is still being gained (prior to fledging age).
The First Feed
The first feed will almost always be the most difficult one. A chick is unlikely to open its beak and accept food from a syringe or spoon straight away as it has never seen either item before, so you will need to reassure the chick that the tool is providing food. Expel some of the warmed-up formula onto the corner of the chick’s beak. If the chick is hungry, this will usually be enough to get it to open up and accept food.
The first feed will need to be a good experience for a chick, as the chick’s willingness to accept food from then on will depend on it, so remember to be gentle.
Where to Feed
A chick should be fed in a safe area on the ground or in an escape-proof container to prevent falls. Remember that some chicks – especially chicks with underlying conditions such as stunting (see article ‘Hand Rearing: Young Birds and Stunting) – can be very active beggars and can stand very tall for their small stature, making it easy to fall over barriers, out of hands or off other structures. Being clumsy by nature, your chick is likely to fall over when begging, so make the area it begs in as safe as possible. The area should also be easy to clean, warm, and away from the brooder to allow for cleaning or changing of substrate. Once the chick has been fed, place it back into the brooder as soon as possible to ensure food is digested in a warm environment, as cold environments will slow a chick’s digestion and lead to possible crop problems.
Keeping Clean
Cockatiel chicks are naturally messy animals, so require a lot of cleaning. Ensure that you always keep feeding areas free of old food, as old formula can create a hot-spot for bacteria and yeast which can easily get into a curious chick’s system when nibbled on. Do not use any strong chemicals such as cleaning sprays, no matter how safe or natural the chemical states it is, as these chemicals can easily be ingested, or fumes inhaled, and cause problems within a chick’s body.

Link to purchase
Cockatiel chicks, being messy eaters, will get food on themselves at some point. Though it is best to wipe food off a chick with a warm tissue or paper towel directly after feeds, this can sometimes be difficult as you do not want to put pressure on a full crop and the chick itself may be restless due to feeding.
To remove dried formula or droppings from a cockatiel chick, you will need a bowl of warm water and a rag, paper towel or tissues. Wrap the chick in a towel or blanket and hold it somewhere warm to prevent chilling (placing the blanket or towel in the drier prior to cleaning the chick can also assist in keeping it warm). Dip the rag, tissue or paper towel into the warm water and use this to soak the dried formula or droppings on the chick. Repeat this until the mess begins to fall or chip off and continue until the chick is completely rid of mess. Be patient in this activity and avoid using your nails or pulling on feathers or down. If you use your fingers, cover them in warm water and gently scrub the area.
It is important to take your chick’s warnings into consideration throughout this process. If your chick cries out, it’s usually a sign you are hurting it and you will need to stop what you are doing to prevent any damage. Often formula or droppings will encase pinfeathers or down, and owners can pull out or damage these feathers or down without knowing while trying to remove the mess.
Overall, the younger a chick is, the more effort will be needed for cleaning. Chicks will not properly preen themselves until they reach around 3-4 weeks old – some even older – and will therefore need their owners to clean them during this time. Chicks that are reared alone will also need a lot of attention, as they will not have a partner to preen hard-to-reach places, such as the back of their heads, for them.
The Importance of Interaction

Just like human babies, the importance of spending time with cockatiel chicks during their early days is vital. The time you spend with your bird will determine the nature of its relationship with not just you but all humans for the rest of its life. Therefore, it’s important that you create a positive, affectionate and trusting relationship with your chick from the moment you take it from the nest for hand rearing.
Interacting with a chick at a very young age can be difficult, as the chick will not have the curiousity to play and explore its environment that an older chick will. Younger chicks will also be far less tolerant to temperature changes, meaning they will not be able to stay out of their brooders for long and will usually be completely food and sleep-oriented. During this time, simply ensuring you handle your chick often, especially at feeding time, being gentle and nurturing during the feeding process and checking up on your chick often should be enough interaction to keep it healthy and satisfy its need for affection.
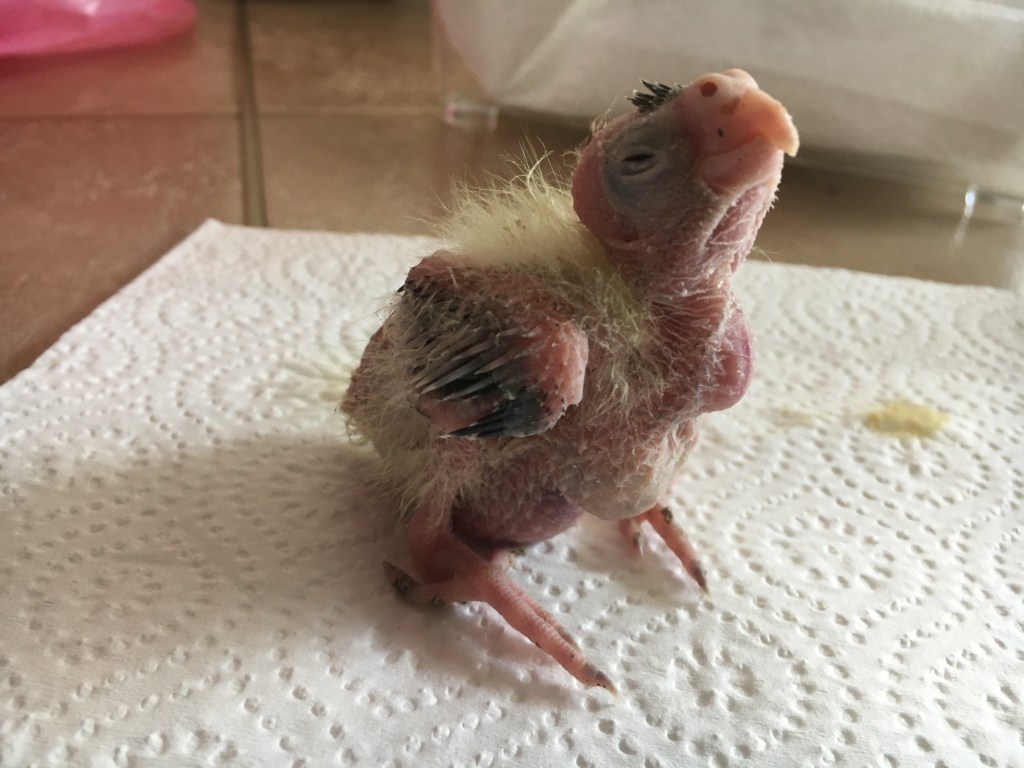
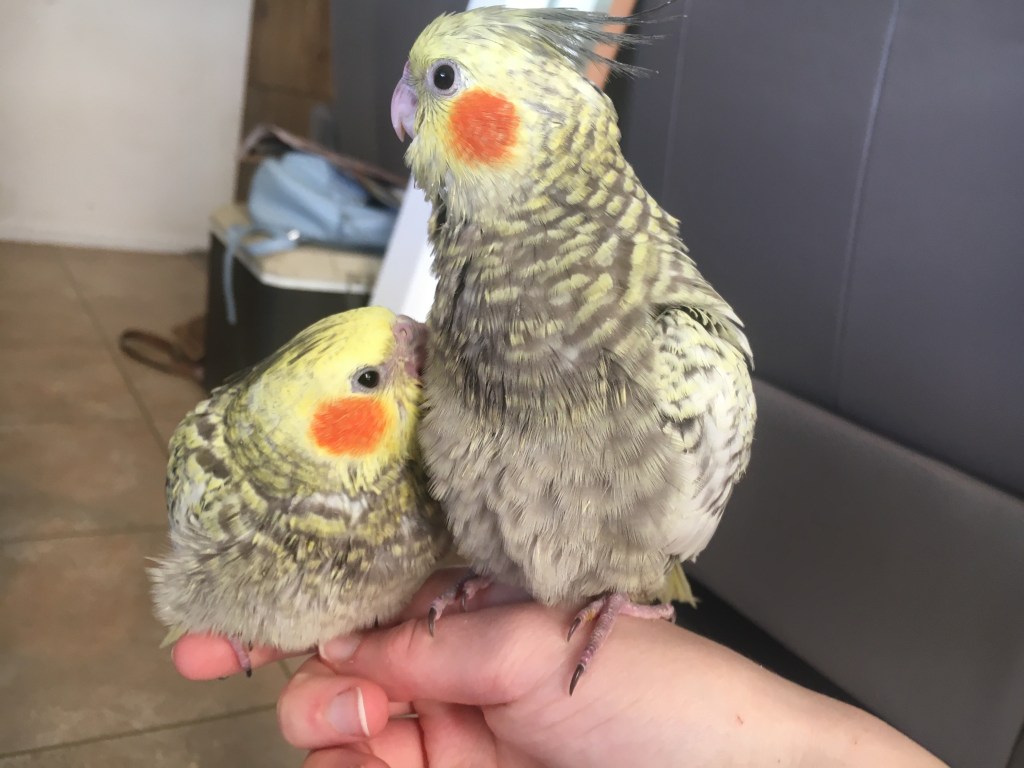
It is when your chick is around 2-3 weeks of age, however, that interaction becomes most important. Chicks at this age will become naturally curious and will begin to walk around and explore their environment. They will also be more tolerant to cooler temperatures, more stable on their feet, and more aware of the dangers around them such as falling. They will be more likely to grip things, making them safer to carry around, and their eyes will be open, helping them to properly process the things around them, preparing them for fledging when they will leave the nest.

During these ages, it is important that feeding is not the only interaction you have with your bird. Take your chick out for about 20 minutes between feeds. Ensure the chick has a safe and warm (and easy-to-clean) place to sit, such as on a blanket or towel, and simply sit still with the chick in your lap. Softly scratch the chick on the cheeks or top of the head and back of the neck if the chick permits and if the chick is developing feathers, help it shed the hard ‘pin-feather sheaths’ that cover the new feathers by gently scratching them off. Note that pin-feather sheaths will only come off when the feathers are well enough developed, so vigorously picking at these casings can be both painful and cause damage to the feathers beneath.
The older your chick gets, the longer it will be able to spend with you and the more curious it will become. Your chick may begin to leave the comfort of its resting spot and walk around on your lap or explore the area you’re sitting in. This is completely normal behaviour and should be encouraged as long as it is safe to do so. Your chick will also begin to nibble on things around it such as shoe-laces, carpeting and towels, so ensure that there is something safe – such as paper or paper-twine – for your chick to play with. Young chicks will not be as cautious as adult cockatiels and may end up eating toxic goods or items such as lint or plastics that can impact the crop and prevent digestion, so it is always important you provide a safe and constantly monitored playing space.
Weaning

At around 2-3 weeks of age, a chick will get curious with the world around it and will start to nibble at items in its nest. This is generally agreed to be the best time to start introducing a chick to solid foods, beginning a process known as ‘weaning’.
It’s important that seeds are introduced to a cockatiel’s life early, usually by providing a small bowl on the brooder floor for the chick to play with. Cracking open seeds can be difficult for young birds and they will need a sufficient amount of time to learn this skill. Even though information about cockatiel care and the variety of foods they eat – such as pellets, fruits and vegetables – is now more widely known, a high number of owners still continue to give their cockatiels all-seed diets, further increasing the importance of knowing how to eat seeds.
However, as stated above, cockatiels should eat a wide range of different foods and these can and should still be introduced to growing chicks. Things such as spinach, bok choy, apple, brussel sprouts and dried fruits can be favourites for cockatiels and can promote a healthy liver and healthy gut development. Try using a household peg to clip these foods to the brooder. Don’t be disappointed if your chick doesn’t eat these foods straight away, as most chicks will need time to adjust to new foods or to even gain enough confidence to try them.
Fledging
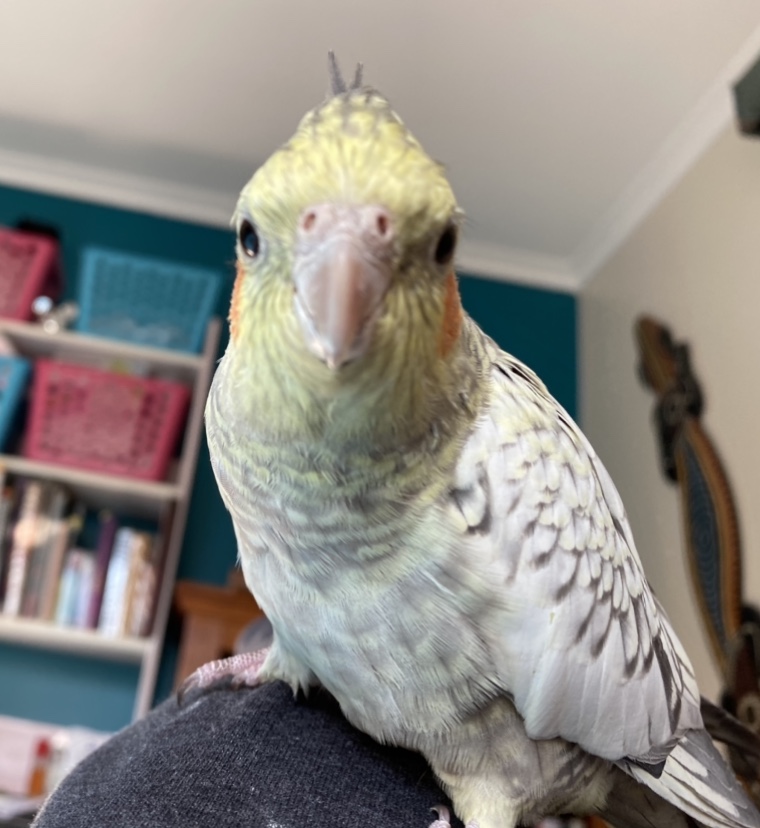
‘Fledging’ is the time in which a young bird learns to fly. For cockatiels, this time is usually between 3-5 weeks of age. You will know when your cockatiel is preparing to fledge as it will rapidly flap its wings in its brooder or when it is taken out for feeding and interaction.
A chick nearing fledging will usually begin losing weight in order to prepare for flight, ridding of the typical ‘baby-fat’. It is normal for your chick to refuse feeds or to eat less during this period, as long as your chick is still eating regularly and is still of reasonable weight (80-100 grams). Once the chick is comfortable flying and has hit its ideal weight (usually around 90 grams) it will continue to eat as usual.
It is important to remember your chick’s safety when they’re first learning to fly. Keep all windows, mirrors or other transparent surfaces closed and covered to prevent injury and ensure all ceiling fans, heaters or other potentially dangerous or hot items are switched off. Remove any sharp dangerous items from access, including hiding any items that may be sitting on benches or tables. A chick’s first flight will be far from graceful or coordinated and there is very little way to predict where it will fly. For that reason it is best to ensure all accessible areas are safe.
When to Stop Feeding

Once a cockatiel chick has reached a point where it is comfortable eating solid foods, it will begin rejecting meals until, eventually, it will reject all formula feeds altogether. This is the point of complete weaning, where a chick will no longer require any hand-feeding.
Not all chicks will be so eager to finish hand-feeding as quickly as others, so it is important to continue hand-feeding chicks even if their siblings have already fully weaned onto solid foods. This will not only ensure they keep up their weight, but will also continue a sense of trust and affection between you and your chick. Cockatiel chicks, much like human babies, need the comfort of reliable feeds to develop strong, loving and healthy relationships with others.
There are some instances when forced weaning may be necessary. However, these instances are quite rare and are usually due to illness, early trauma, or birth-deformities. If your chick is still begging for and consuming formula beyond normal weaning age, or consuming more formula than the average chick at its age, it would be safer to consult an avian vet before proceeding with any forced-weaning to identify if there is any possible underlying condition that could be causing this problem, or could cause other issues in the future.
Regression

Regression is the process of a chick – who was originally believed to be fully weaned – reverting back to begging and requiring formula. Regression can occur for many reasons, but most commonly occurs when a chick is re-homed. The stress of moving away from its bonded parent-figure and into a new home with a person who they are unlikely to be comfortable or familiar with can easily result in the chick becoming overwhelmed, especially when said chick has been re-homed at a significantly young age (usually 7-9 weeks old). It is for this reason that avian vets recommend only adopting cockatiels above the age of 8 weeks. In general, cockatiels should be weaned and confidently eating solid foods for at least 2 weeks before being re-homed.
It is important that you, as a breeder, provide adopters of your chicks with contact details and information about the signs of regression (begging, head-bobbing and weight-loss) so that they can contact you if regression were to occur and you can take the chick in and re-wean it for the new owners. Never encourage an adopter to hand-feed a chick you have sold them. New owners are likely to be inexperienced and ill-prepared for formula-feeding, resulting in damaging hand-feeding practices. They are also likely to use different feeding tools, different types of formula, and have different feeding-schedules, all which can lead to gastrointestinal upset in a chick.
To re-weaning a chick, simply simpy restart the cycle of hand-feeding, waiting for the chick to refuse formula, and observing the chick ‘ eating habits until you are confident the chick can eat sufficiently on it’s own.
Illness
When rearing cockatiels for the first or even second time, it can be difficult to recognise when a chick is ill.
Cockatiels are known as ‘prey items’ to other carnivorous animals due to their small size and general lack of aggression. Wild cockatiels also live in large flocks, meaning predators of cockatiels will usually hunt after the slowest of the flock: the youngest, weakest or sickest. For this reason all cockatiels, wild or domestic, will attempt to hide illness from others by showing little to no signs of being sick until the illness is too intense to hide. By this time, the cockatiel will usually require serious and immediate veterinary intervention.
Cockatiel chicks can be especially difficult to gauge as most people are not familiar with the differences between normal and abnormal chick behaviour. For these reasons, it is vital to remember the signs and symptoms of illness in cockatiel chicks, and to have an emergency plan on hand.
For advice on putting together your first-aid kit, see the article: ‘Assembling Your Cockatiel-Rearing Toolkit’.
Signs of illness in chicks include:
- Significantly pale or flaky skin
- Significantly reddened skin
- Bruises or lacerations on the body
- Lesions or weeping wounds on the crop (likely crop-burn)
- Constant air-bubbles in the crop
- A crop that empties too fast
- A crop that fails to empty at least 3/4 between feeds, or fails to completely empty overnight (long non-feeding period)
- Visible dark veins on the crop
- Food visibly moving in the crop
- Runny, mucousy or very dark or light green droppings
- Lack of droppings
- Regurgitation of food or vomitting
- Droppings gathering on the face, vent or other area of the body
- White fluid around the eyes or nostrils
- Constant heavy breathing or panting that does not cease when heat is lowered (not overheating)
- Gasping for breath
- Repeated sneezing (some sneezing is normal in chicks, as formula can enter nostrils, but constant sneezing long after feeds is abnormal)
- An apparent lack of growth, weight gain or development
- Weight loss that is not as a result of fledging
- Refusing to eat or lack of begging
- Lethargy or constantly dropped head
- Constantly begging for food or trying to eat (pumping) non-food items
- Constant hissing, backing away and other defensive behaviours (normal for chicks to hiss as they reach around 2 weeks of age, especially as soon as the brooder is opened, but hissing and swaying should not occur during feeding when the chick is usually comforted)
- Significantly spiked pinfeathers or puffed feathers (facing outwards rather than flat against the body, excludes crest)
- Tail bobbing or constantly extended wings
- Significant feather loss or feather plucking before molting age

When you see these symptoms, it is important to keep your chick in their warm, dark brooder until you are able to get it veterinary assistance. As a safety precaution, always keep your nearest avian vet clinic or emergency 24 hour vet clinic’s number on hand.
For more information on cockatiel chicks and illnesses, see: Hand Rearing: Common Cockatiel Chick Illnesses and How to Cure Them.
Helpful Resources

http://www.ask-noodles.com/
This site is run by an experienced cockatiel hand-rearer and details the methods of rearing, common illnesses and what they look like, and the expected development of chicks, using helpful diagrams and images that are easy to understand.
https://www.yellowrockonline.com.au/caring.html
A site that details the cockatiel-rearing process and includes tables that list the recommended feeding schedules for chicks based on their ages, as well as recommended brooder temperatures based on chick ages.
https://www.cockatiel.com/handfeeding.html
A site that details the hand-rearing process, and also includes videos of chicks being fed for reference.
https://www.youtube.com/user/Vetafarm
YouTube channel run by Vetafarm, a veterinary-approved company that produces a range of hand-feeding products including the popular and recommended formula Vetafarm Neocare. This channel posts a range of tutorial videos detailing the hand-feeding process.
https://www.kaytee.com/learn-care/pet-birds/hand-feeding
Site of the popular US pet brand Kaytee. This site details the hand-rearing process and contains links to useful PDFs such as hand-feeding charts.
https://forums.avianavenue.com/index.php
A forum in which experienced hand-rearers will often answer questions to assist in the hand-rearing process and any problems that may arise. The forum is well monitored and all levels of experience are welcomed. The topic ‘Nursery Rhyme Dive’ is very useful for hand-rearers.
References
Martin, T., Andersen, D. (2007). A guide to cockatiels and their mutations as pet & aviary birds. Revised Edition. South Tweed Heads: ABK Publications.
Link to Purchase: https://birdkeeper.com.au/products/a-guide-to-cockatiels-and-their-mutations-as-pet-aviary-birds-revised-edition-hard-cover?variant=29194753671267
Digney, P. (1998). A guide to incubation & handraising parrots. South Tweed Heads: ABK Publications.
Link to Purchase: https://birdkeeper.com.au/products/a-guide-to-incubation-and-handrearing?variant=29193748283491

Leave a comment